As I mentioned previously, I have a Weekly Reads page that I set up to make it easier for me to share articles with my dad and brother (and anyone else who cares), complete with RSS feed. But let’s be real, neither of them wants to be bothered with my feed because they have stuff to do and we already have a tradition of emailing links to each other.1
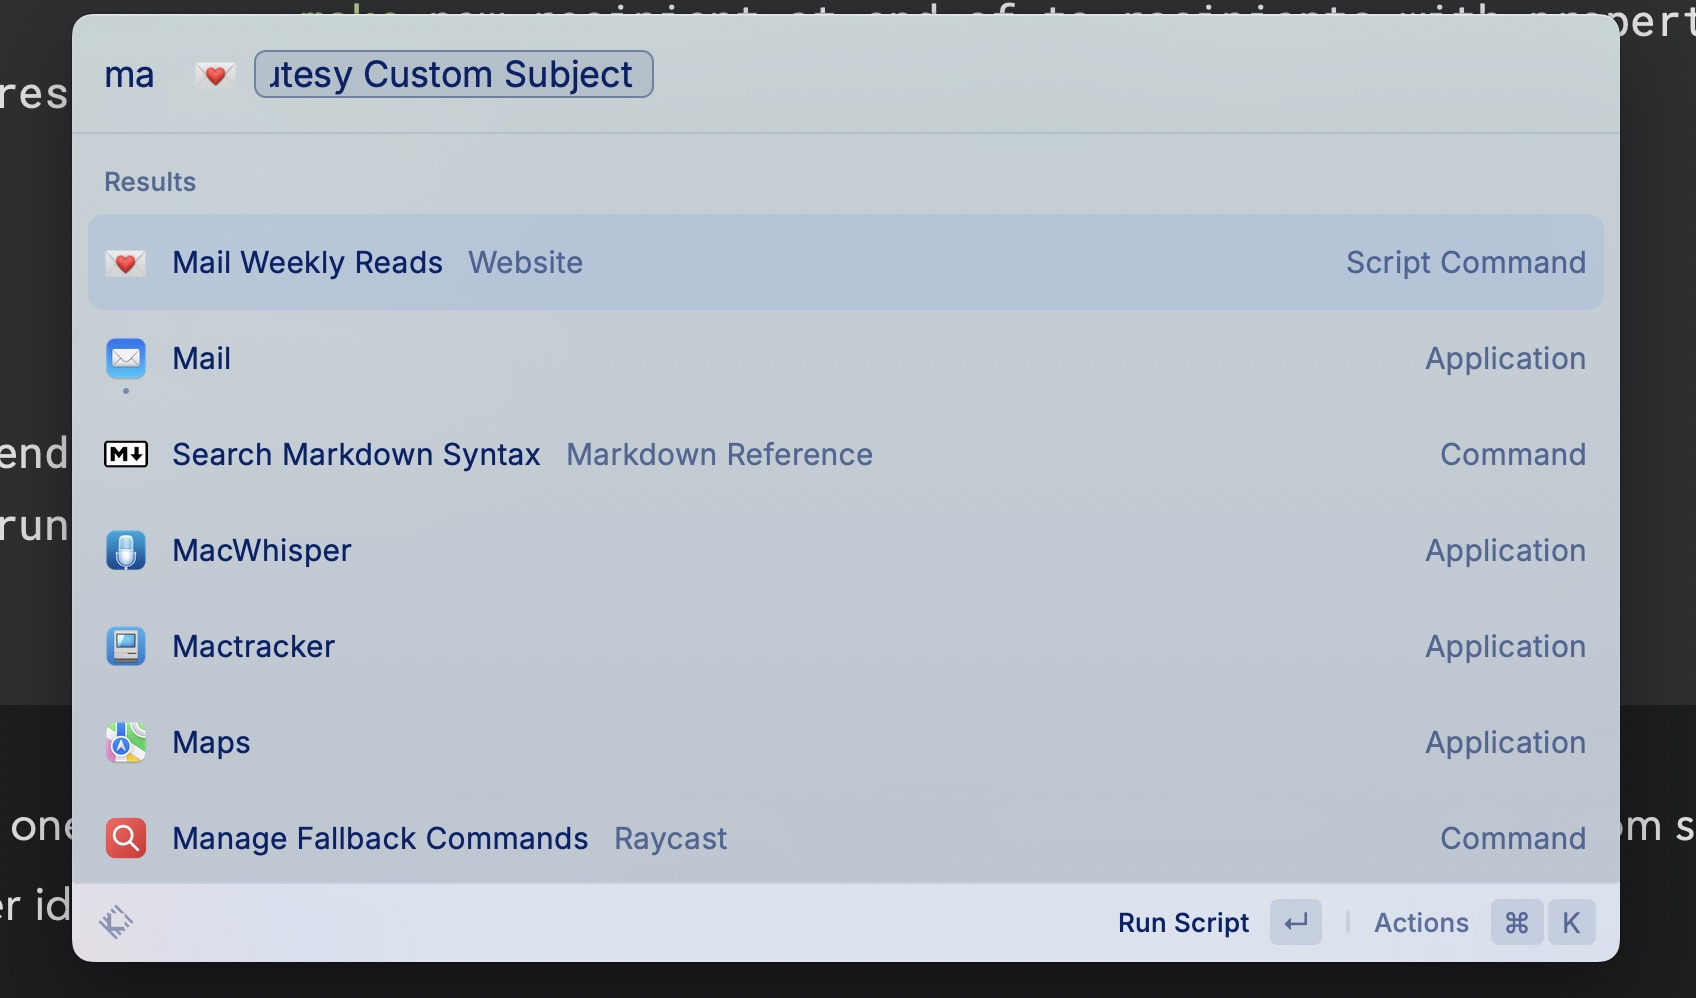
Last night I created a Raycast Script Command that looks at the markdown file for my latest Reads update, parses and reformats it for email, and mails it out to them. It looks like this:
set theTos to {"dad@dads.com", "brother@brothers.com"}
set theCcs to {}
set theBccs to {}
set theSubject to "$subject"
set theSignature to ""
set theAttachments to {}
set theDelay to 1
set theMessage to make new outgoing message with properties {sender:theFrom, subject:theSubject, content:theContent, visible:false}
tell theMessage
repeat with theTo in theTos
make new recipient at end of to recipients with properties {address:theTo}
end repeat
end tell
send theMessage
end tell
end run
EOD
It takes one parameter when I run the script so that I can give the email a cutesy custom subject (another idea I stole from my brother).
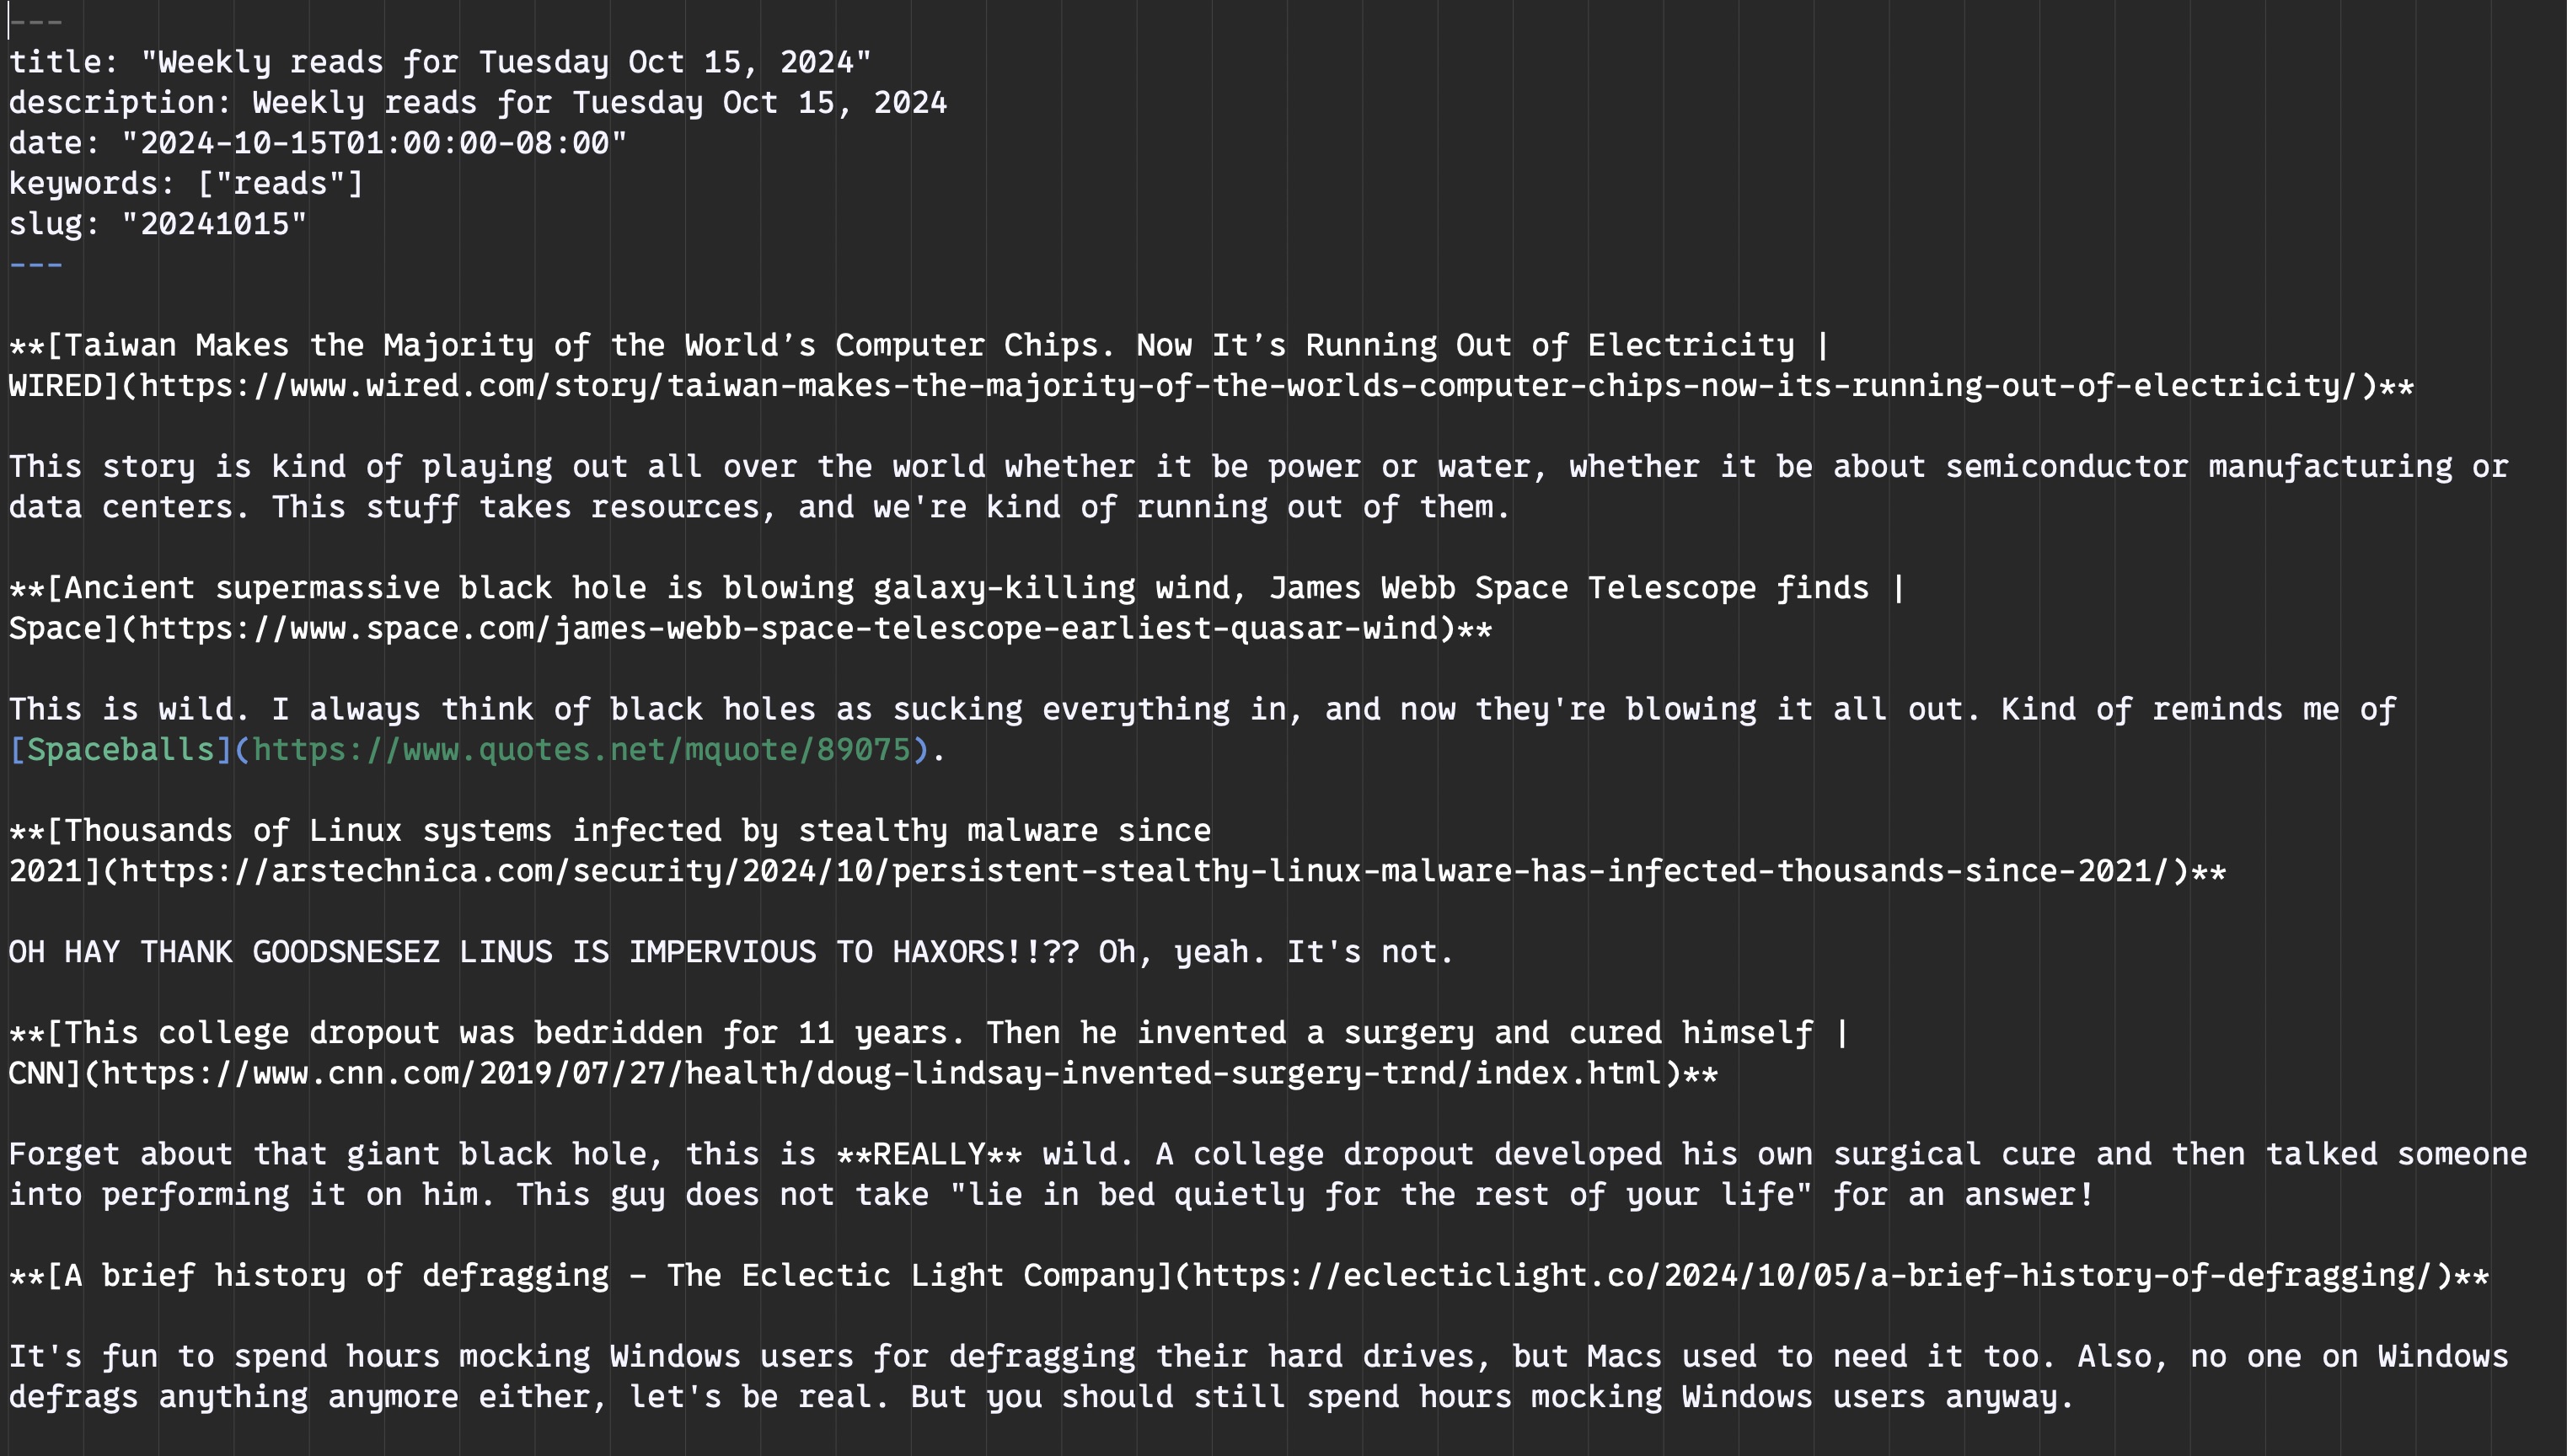
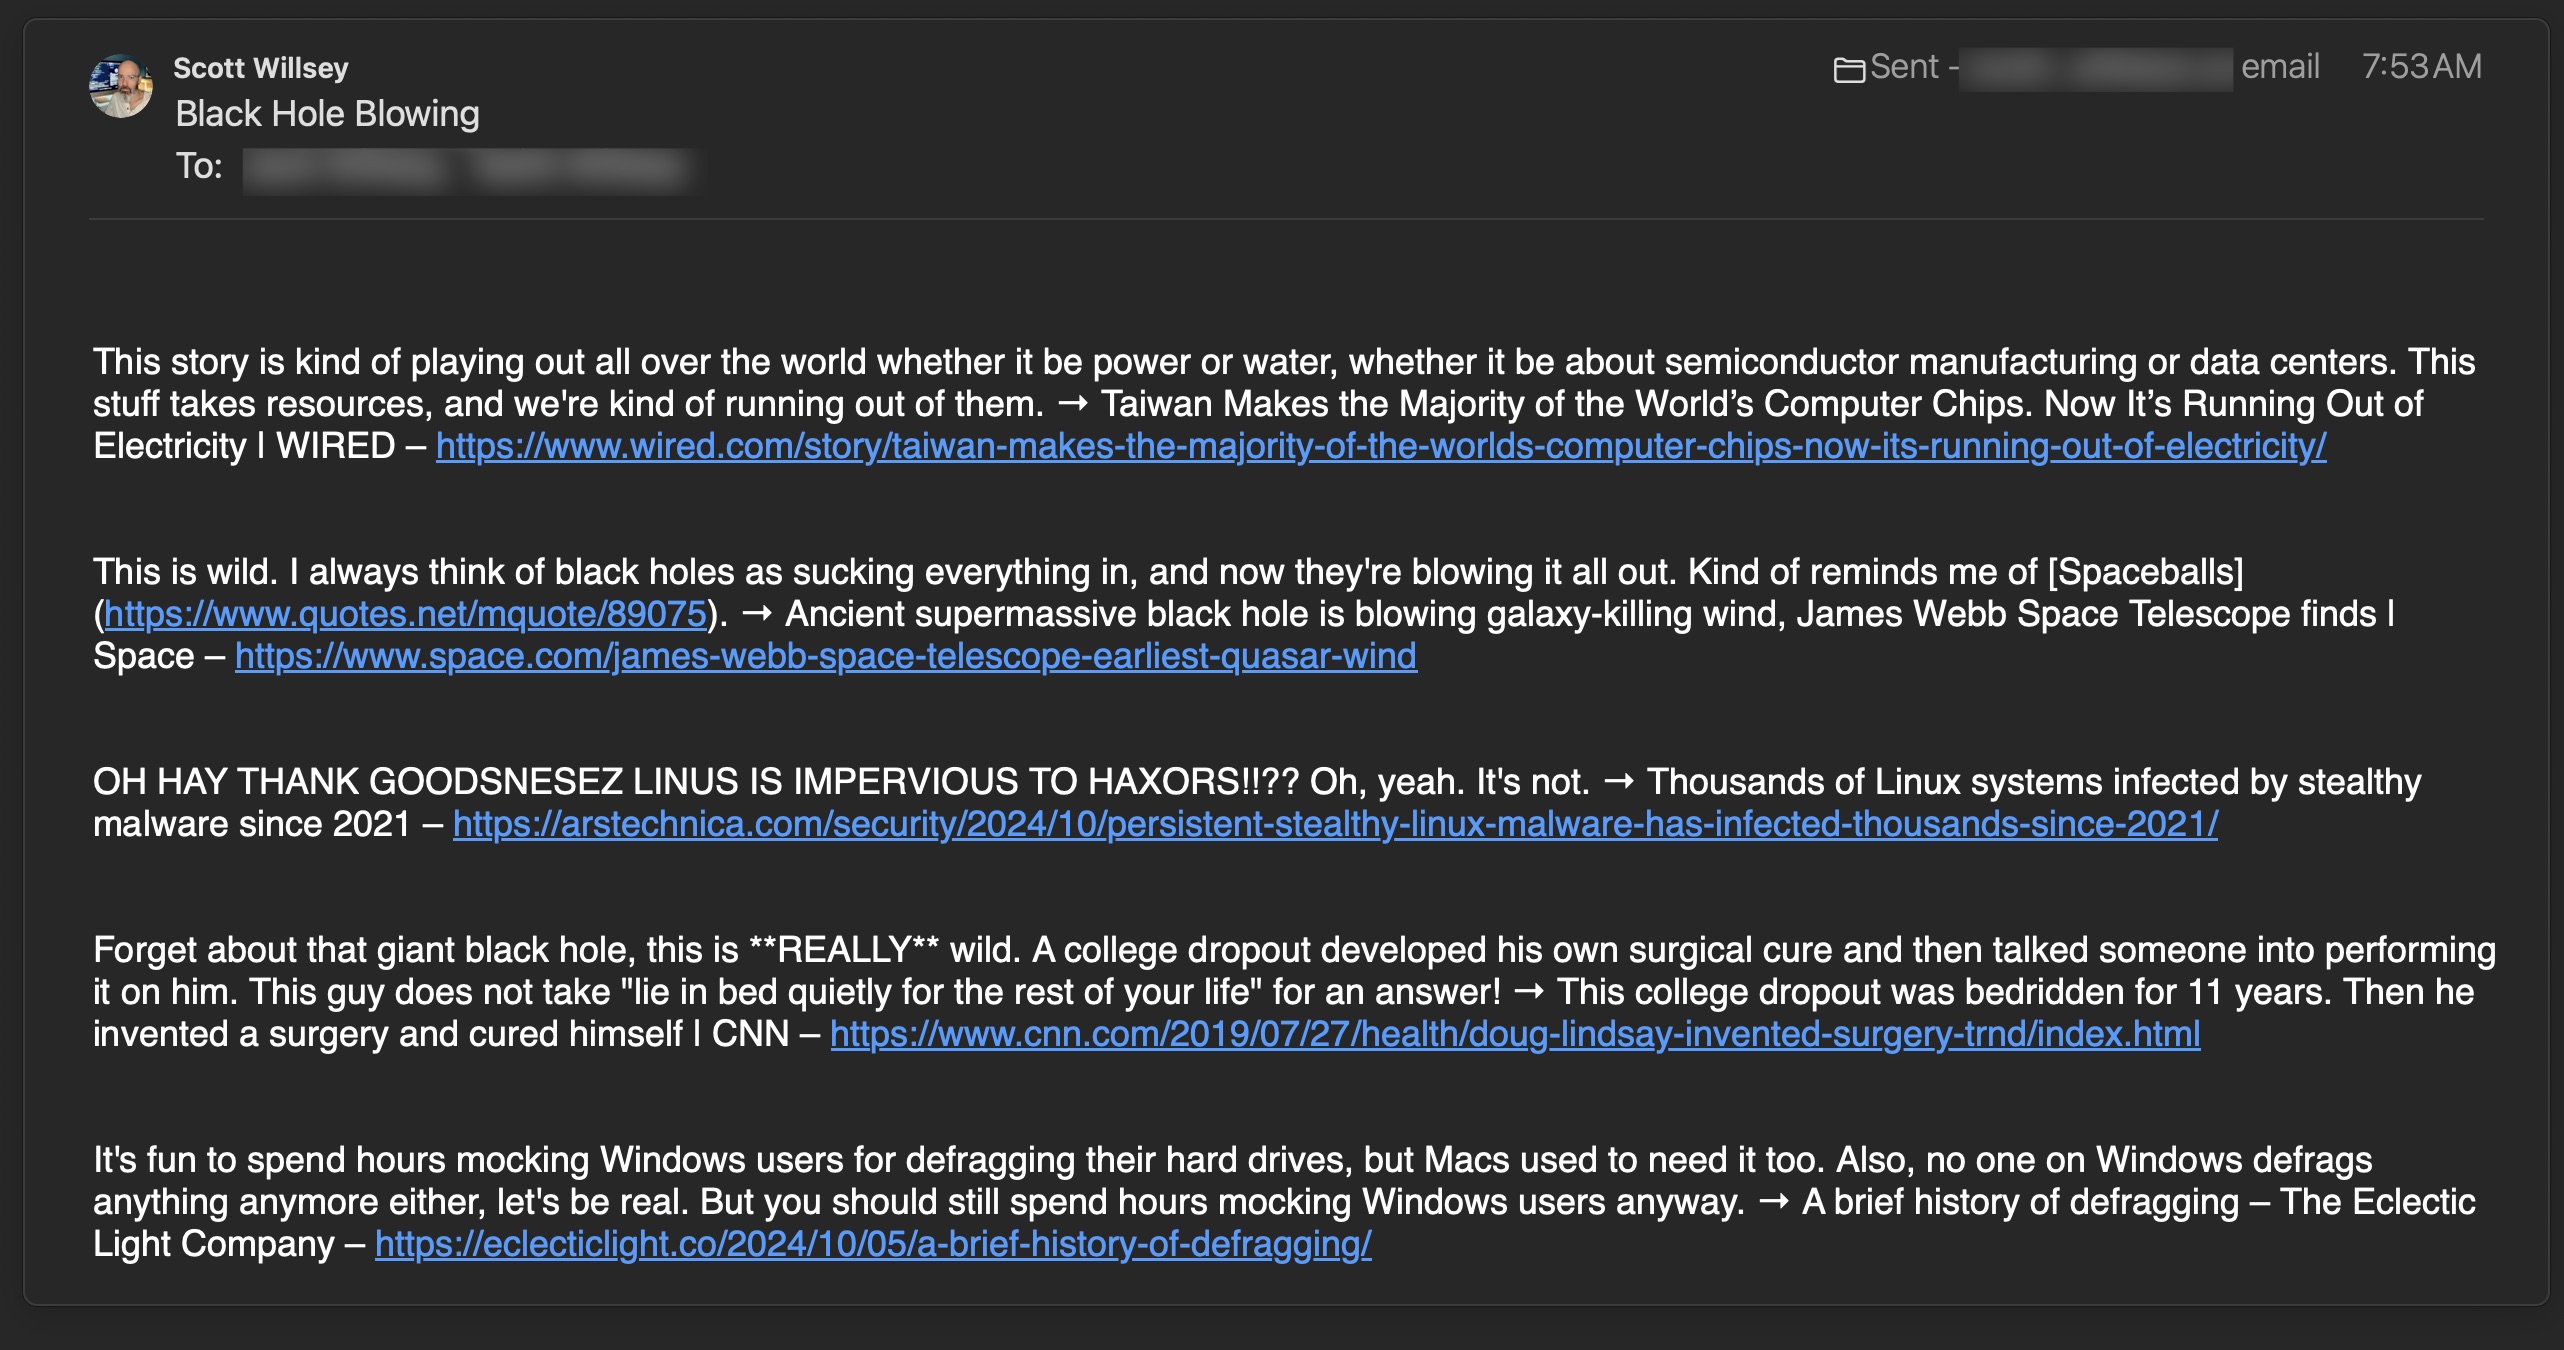
Then it parses the latest file in my web project’s /src/content/reads directory, replaces markdown links with “commentary → link title – link” for each link and following commentary paragraph in the page, and gives that to an AppleScript to send the mail.
Recently Niléane of MacStories wrote about the Raycast extensions she uses in Adding to My Mac’s Swiss Army Knife: A Raycast Extension Roundup - MacStories. I learned about a couple good ones that I wasn’t aware of, but I also thought I would list Raycast extensions I use here, along with a little bit about why for each of them.
I actually underutilize this one. It allows for opening items in various ways (in 1P or in a browser), generating passwords, and more, but I’m so familiar with 1Password’s own keyboard shortcuts that I forget about the Raycast extension.
This is a really outstanding extension that lets you prepend or append text to whatever’s on your clipboard with a pre-specified separator. It sounds like something I should use all the time. I’d actually forgotten I had this one installed. 🤦♂️
Stop me if you’ve heard this one before – here’s an extension that sounds really useful and I just don’t use it. But I should! Checking for new mail, composing an email, sharing finder items to mail, seeing recent or important mail, these are all possible with this extension. I think with most of these it’s a matter of building muscle memory.
I actually have used this extension! The Apple Reminders extension lets you use natural language to set reminds, in addition to allowing you to view and complete them.
Hi, Homebrew users! Want a quick way to see what you’ve installed with Homebrew, or search for and install new formulae and casks? You can do so from wherever you’re at in macOS with this extension.
I use this extension all the time. Capital Case, camelCase, lower case, PascalCase, snake_case, UPPER CASE, and more… select your text and have at it. I love this one.
I just started using this one today. It effectively locks your keyboard until you type ^ U (Ctrl+U) to unlock it, in order to allow you to clean the keyboard without deleting your home folder or sending an obscene message to your boss.
I’m currently a heavy CleanShot X user and this extension has a ton of useful CleanShot X commands, but once again… the old muscle memory. If you picked up on the fact that I’m primarily writing this article to benefit myself, you win the prize of knowing how insightful you are.
I use this all the time to clear formatting from items in the clipboard. It comes in handy for certain things I have to enter into excel, for example. Yes, you can tell excel to paste in content only, but this is faster for me, and it’s also useful anywhere you need formatting removed.
I use ColorSlurp for color picking and therefore I use this extension to quickly launch it and grab colors, but truthfully I may very well switch to Color Picker instead. In fact, I’m doing it right now.
Oh, I love this one. For example, I just had a finder window with some pdfs in it open and I ran this extension and it gave me /Users/scott/Documents/BlueDragonfly/Sophos/ET15 - Sophos Central Endpoint Protection v5.0 - Engineer/ET15-Sophos-Central-5.0v5-Engineer-EN/01 Sophos Central Overview/ on my clipboard. You can’t beat that!
You ever look in crontab and see something illegible like */15 * * * * python3 /usr/local/sbin/scripts/wanipy/main.py --env prod > /dev/null and you can’t remember what */15 * * * * means? Well, it means run this thing every 15 minutes, and I know that because (well, I already knew that particular one) Cron Description told me!
I know I installed this for a reason, I just don’t remember what it was. Anyway, it lets you use curl to make an HTTP request, complete with custom headers.
I haven’t actually used this yet, but this one helps you create custom folder icons and apply them to folders you want to customize. It’s not something you’ll use every day, but it’s pretty cool.
If you’ve ever struggled with the CSS clamp function, you’ll like this one. You just enter your parameters, like min and max font sizes and min and max viewport sizes, and it’ll generate your clamp for you.
This reminds you what all those pesky HTTP status codes mean AND gives you a cute cat to go with it. The internet was invented for cats. Don’t ever forget it.
I can see why I installed this, but I can’t see why I haven’t used it yet. This grabs web pages or YouTube videos and gets recipe ingredients from them for you.
If you’re thinking “I bet Scott used this extension to list what extensions he has installed”, you win a Ferrari!! I mean, someone else is going to have to provide the Ferrari. But I’ll let you win it if they’re willing to give it. 🤷
I use Notion. I use Raycast. You’d think I’d use this extension. Truth is, I keep forgetting about it (again). I should at least use the search feature, that would save me some time getting to it in the Notion app itself.
Here’s another one I have but never used. It looks like a way to open things in various apps depending on what the source link is, but… I have no clue.
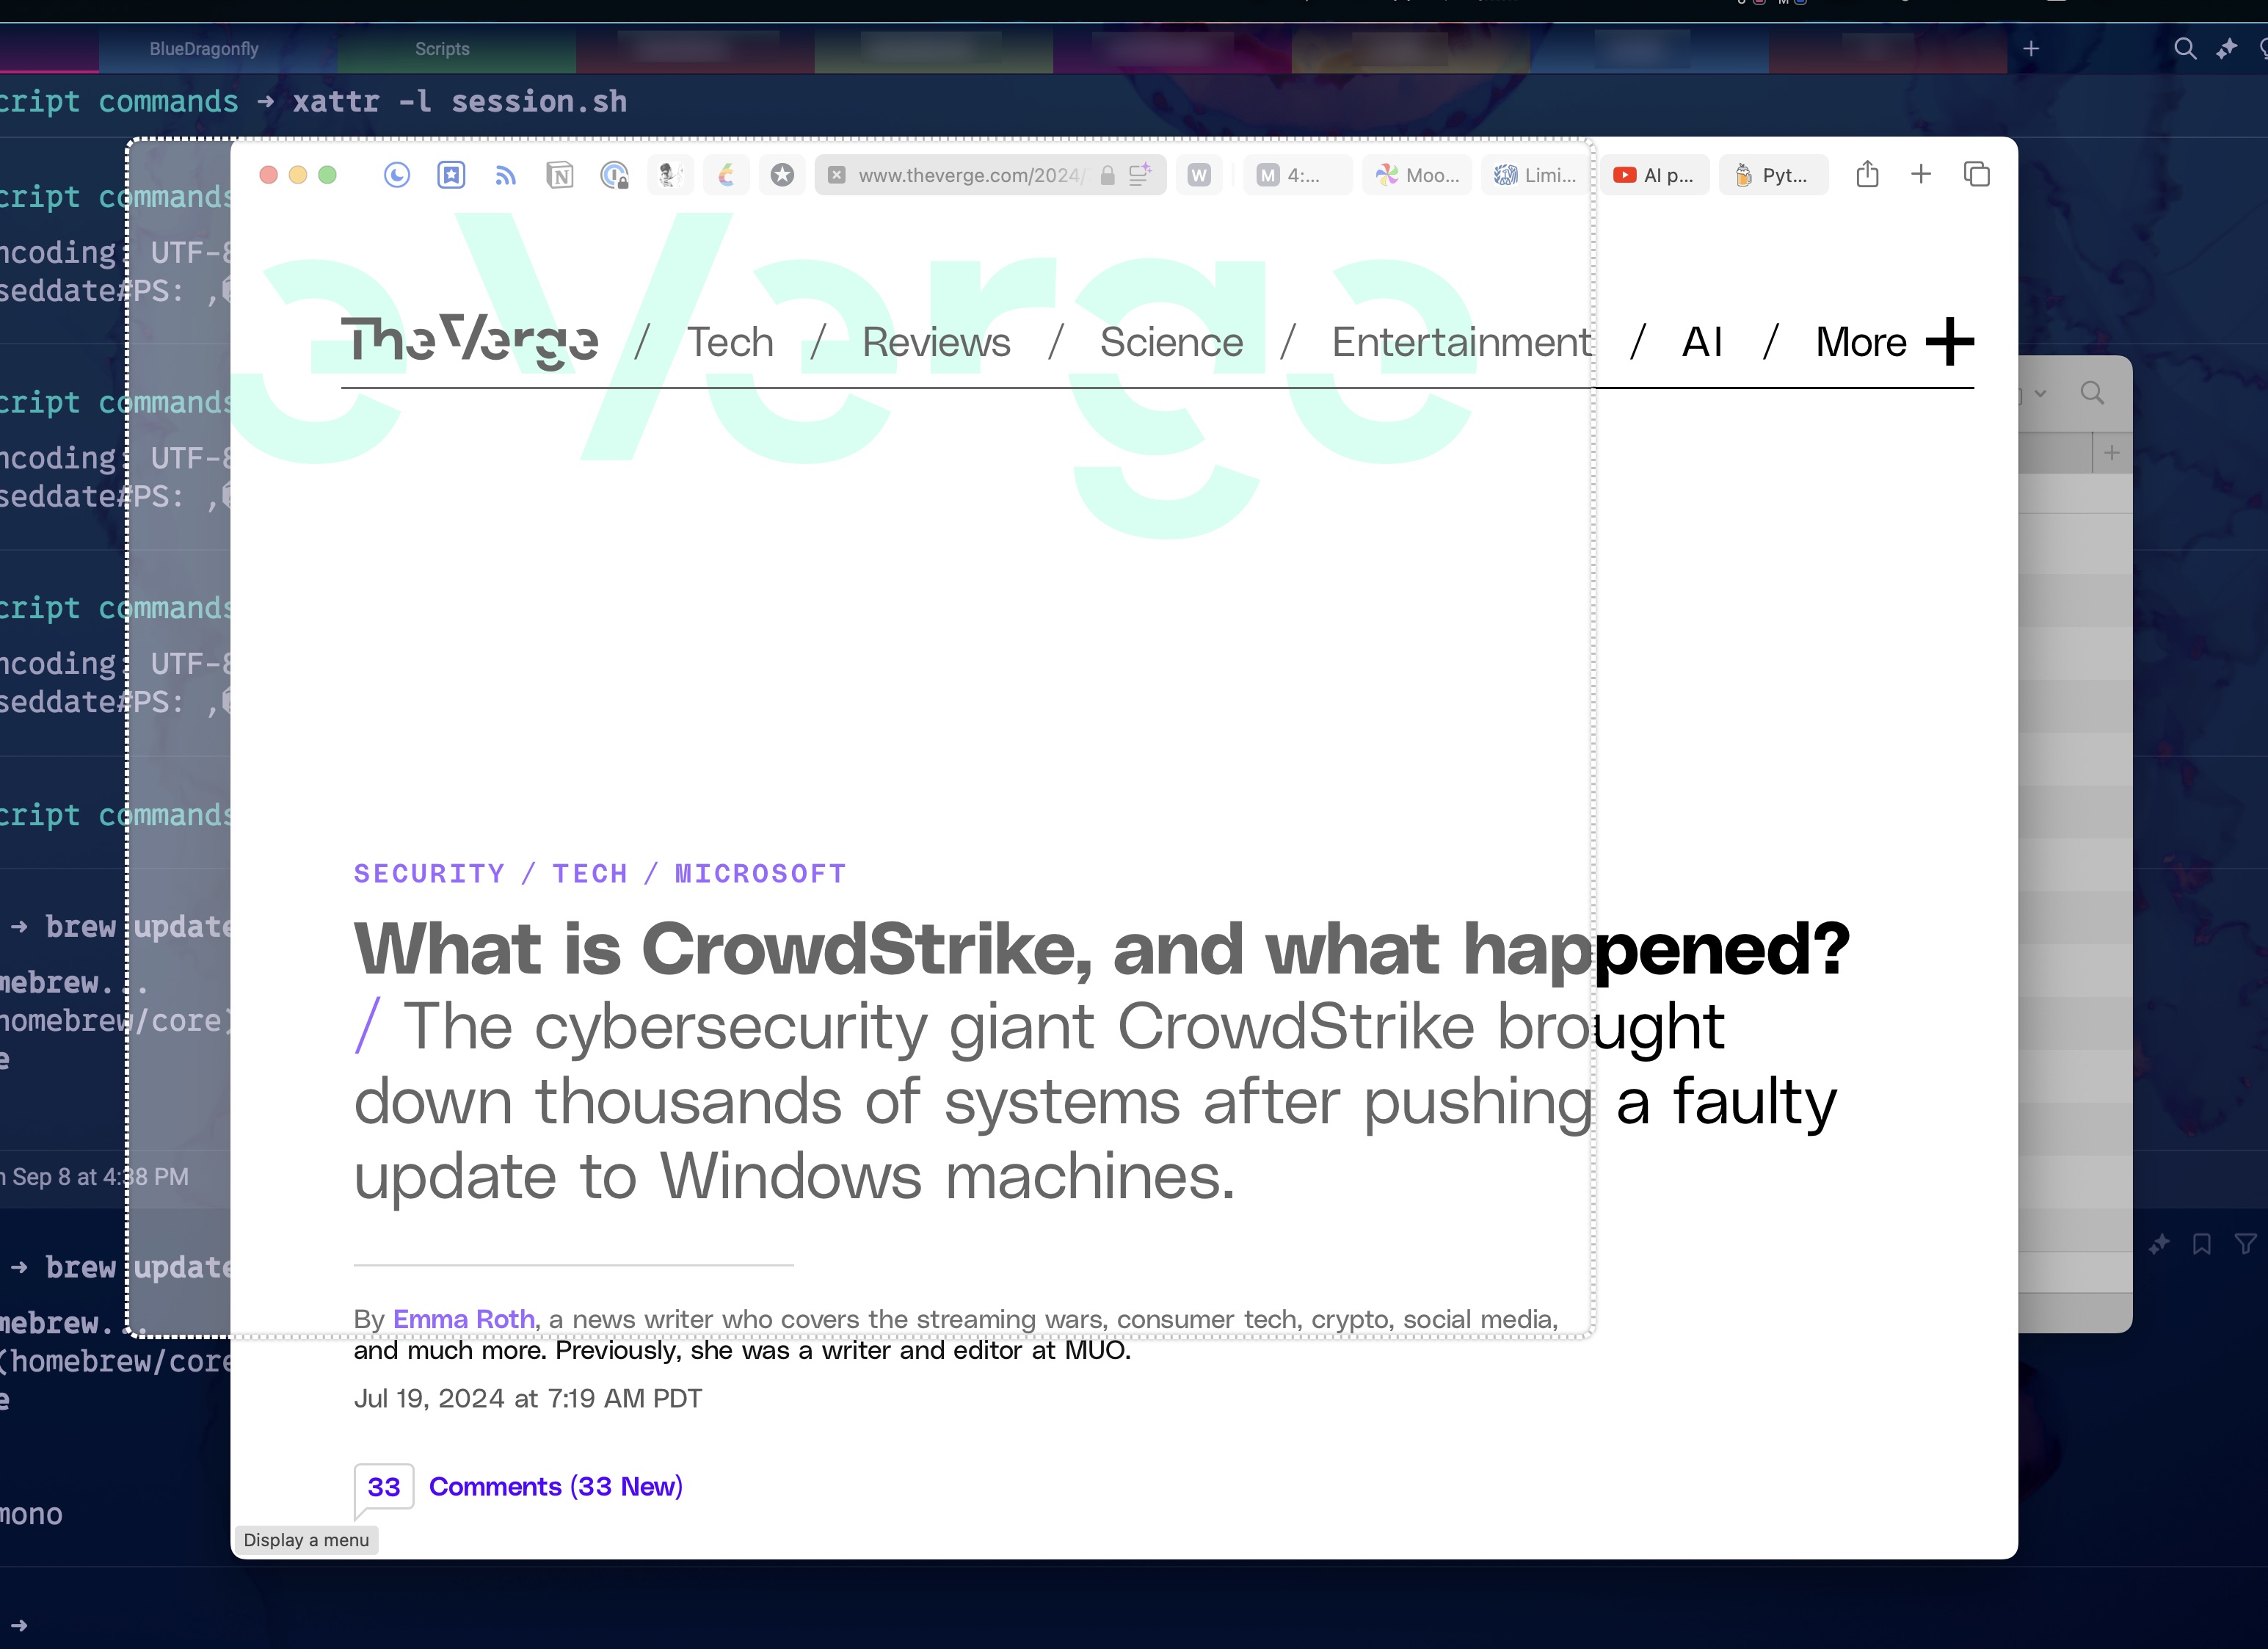
I’m not going to overtly state why I use this one, but I use it quite a bit. I don’t constantly end-run around paywalls on the same sites over and over. It’s for one-offs.
This is a cool one for measuring stuff on the screen. I used this the other day to make a screenshot of a certain form item on a web page vs. what the form item plugin thought the minimum width should be. Yes, I could have used the browser developer tools for that, but this was easier for the client to look at and instantly get the point.
I don’t really use npm for a lot these days because most stuff I script I now script in Python. I of course use npm with things like Astro, but I don’t need to search for anything for that.
This is a great one to use to make sure you’re using your podcast mic instead of the built-in laptop one or whatever else will pick up the cricket in your kitchen.
I genuinely have no idea why I have this instead of the general purpose Visual Studio Code extension. Maybe I was drinking beer the night I installed this.
Somewhere in the world, it’s X o’clock!! Find out where!! Also (and even cooler), put in an IP address and find out what time it is for whatever has that stupid IP.
Speaking of YouTube… download all of YouTube, one video at a time!!!!
Summarium
That’s pretty much it for now. I’m always open to revisiting things and uninstalling some things and installing other things. Most likely in a year from now, not much will have changed though.
My brother likes to send emails to dad and I containing links of interesting things he’s read recently, replete with commentary of his own. I used to send one link at a time to them, then I tried his approach, and now I generally send a link at a time again.
Instead of this nonsense, I thought I’d create a Weekly Reads page to add Weekly Reads posts to, complete with its own RSS feed.
I may call it Weekly Reads, but I may add reads more than weekly or much less than weekly. I don’t know. Don’t pressure me! I have a lot going on! 😄
I need to create some links to it so people can find it and know it exists, but it’s there! It works!
As you may know, I created a Raycast script command to trigger what I call “sessions”, which are really just setting up the Mac to perform different tasks, such as podcasting or “normal” general use. At the time, I was using Raycast for window management, so my script command referenced Raycast window management layouts. Now I’m using Moom for window management, so I needed to update it to call my Moom layouts instead.
In the process, I decided to steal even more from Robb Knight’s App Mode Raycast script command and use his method of killing all apps before activating a session and having an array of default apps that I always want open. It’s almost the same exact script now.
You can see that because my so-called “IT” session sets Chrome as the default browser, I’m compelled to set Safari as my default browser for every other session type. I supposed I could just move that out to the top and have it called no matter what, and then immediately reversed if the session type is “IT”. You can read about my default browser script commands here.
The reason for the sleep commands is that without them, running the Session script command would result in some timing issue in which only some of the apps would open, but not all of them. I was able to solve the problem by putting in a sleep after killing all applications and after setting the default browser.
Calling Moom layouts using AppleScript commands (osascript) is possible because the author of Moom supports AppleScript calls to the program. I wish more programmers would think of their apps as potential links in a workflow chain like this.
You may have noticed, as you’ve wandered the site, that I’m a bit of a Raycast fan. You may, therefore, imagine that I use the Raycast window management tools to move and arrange windows . And it’s true. Well, it was true. Then Many Tricks released Moom 4, the update to their popular Moom window manager app.
Historically, I’m a window manager serial monogamist. Like any other type of utility, there’s a wide range of approaches to this task in the available third-party apps. Some let you draw your window size and location on the screen, some have keyboard shortcuts for instantly popping things into specific locations, some let you save multi-window layouts, and many various combinations of these things. Raycast does two of these things. Moom does all of these things.
At first glance, you might think Moom is a slower way to manage windows. One of its signature controls is the Keyboard Controller, which you activate via a hotkey (in my case ^⌥⌘Space). Once it’s onscreen, you can use the keys indicated on its cheat sheet to move and/or resize your focused window per the options available.
You can also customize the options that appear at the top of that list, and the bottom section will always show any actions you’ve assigned single-key hotkeys for. For example, based on my arrangement above, pop open the Keyboard Controller with ^⌥⌘Space and then hit 3 and you’ll move the foreground window to the left third size of the screen.
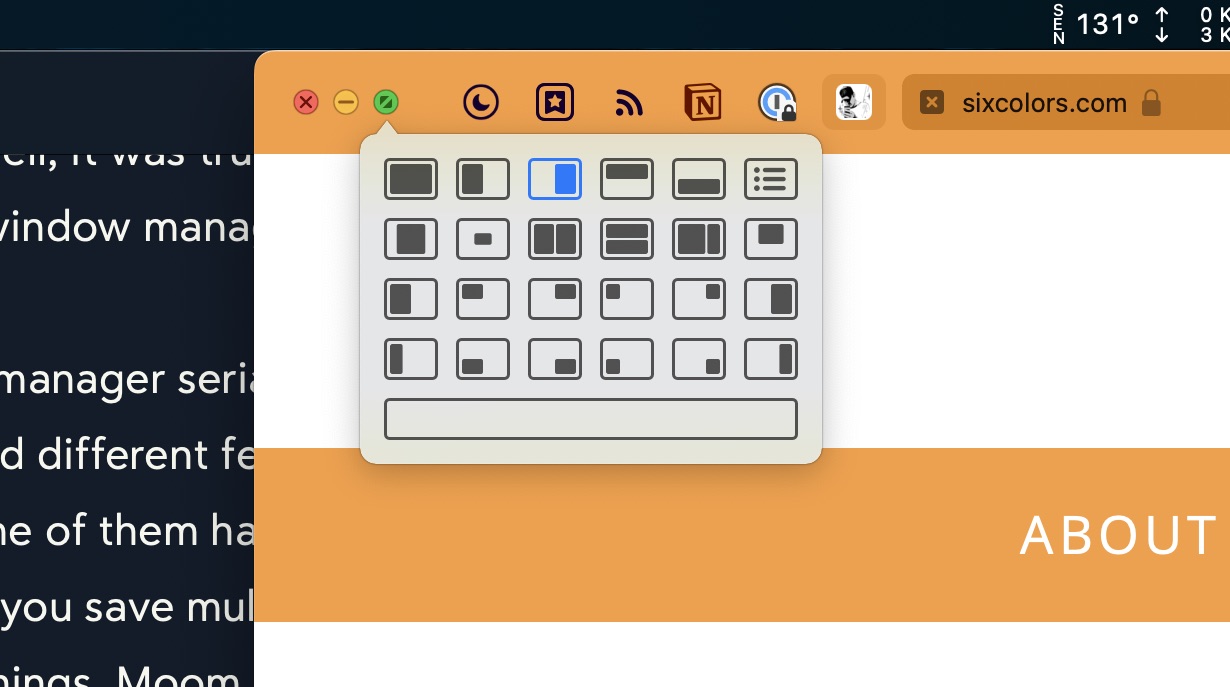
Another great way that Moom allows for window control is something I think may be unique to it – a palette of window management buttons that shows up when you hover over one of the stoplight buttons in the window’s top left corner. You can specify in Moom’s settings which of the three buttons to hover over to get the palette, as well as which window commands are available.
These are all great and dandy, but Moom has freeform sizing and moving options too. You can configure Moom hotkeys that allow you to glide the cursor over a window to move it or to resize it. These options sure beat trying to find an empty spot to click on a title bar filled with tabs, or to find the little grab handles at the edge of the window. Apple really hates onscreen controls and the native resizing controls can be slow to manipulate.
And then there’s the grand champion of all freeform resizing, the Moom grid. It allows you to quickly draw out a window size to fit anywhere on a grid. You can set the number of rows and columns in the grid, which gives you quite a bit of range in window size granularity.
Here’s what it looks like to drag out the shape you want to resize your window to on the grid:
And here’s the resulting resized Safari window.
Despite all these great window management options, sometimes good old fashioned hotkey controlled instant resizing and moving is still the best way to quickly tile windows. Moom allows for that. You can create custom window sizes and locations and assign hotkeys to them. You can also make window layouts with multiple windows that can be applied instantly. Window layouts can be set to apply to specific apps only, or to whatever windows are handy when you apply the layout.
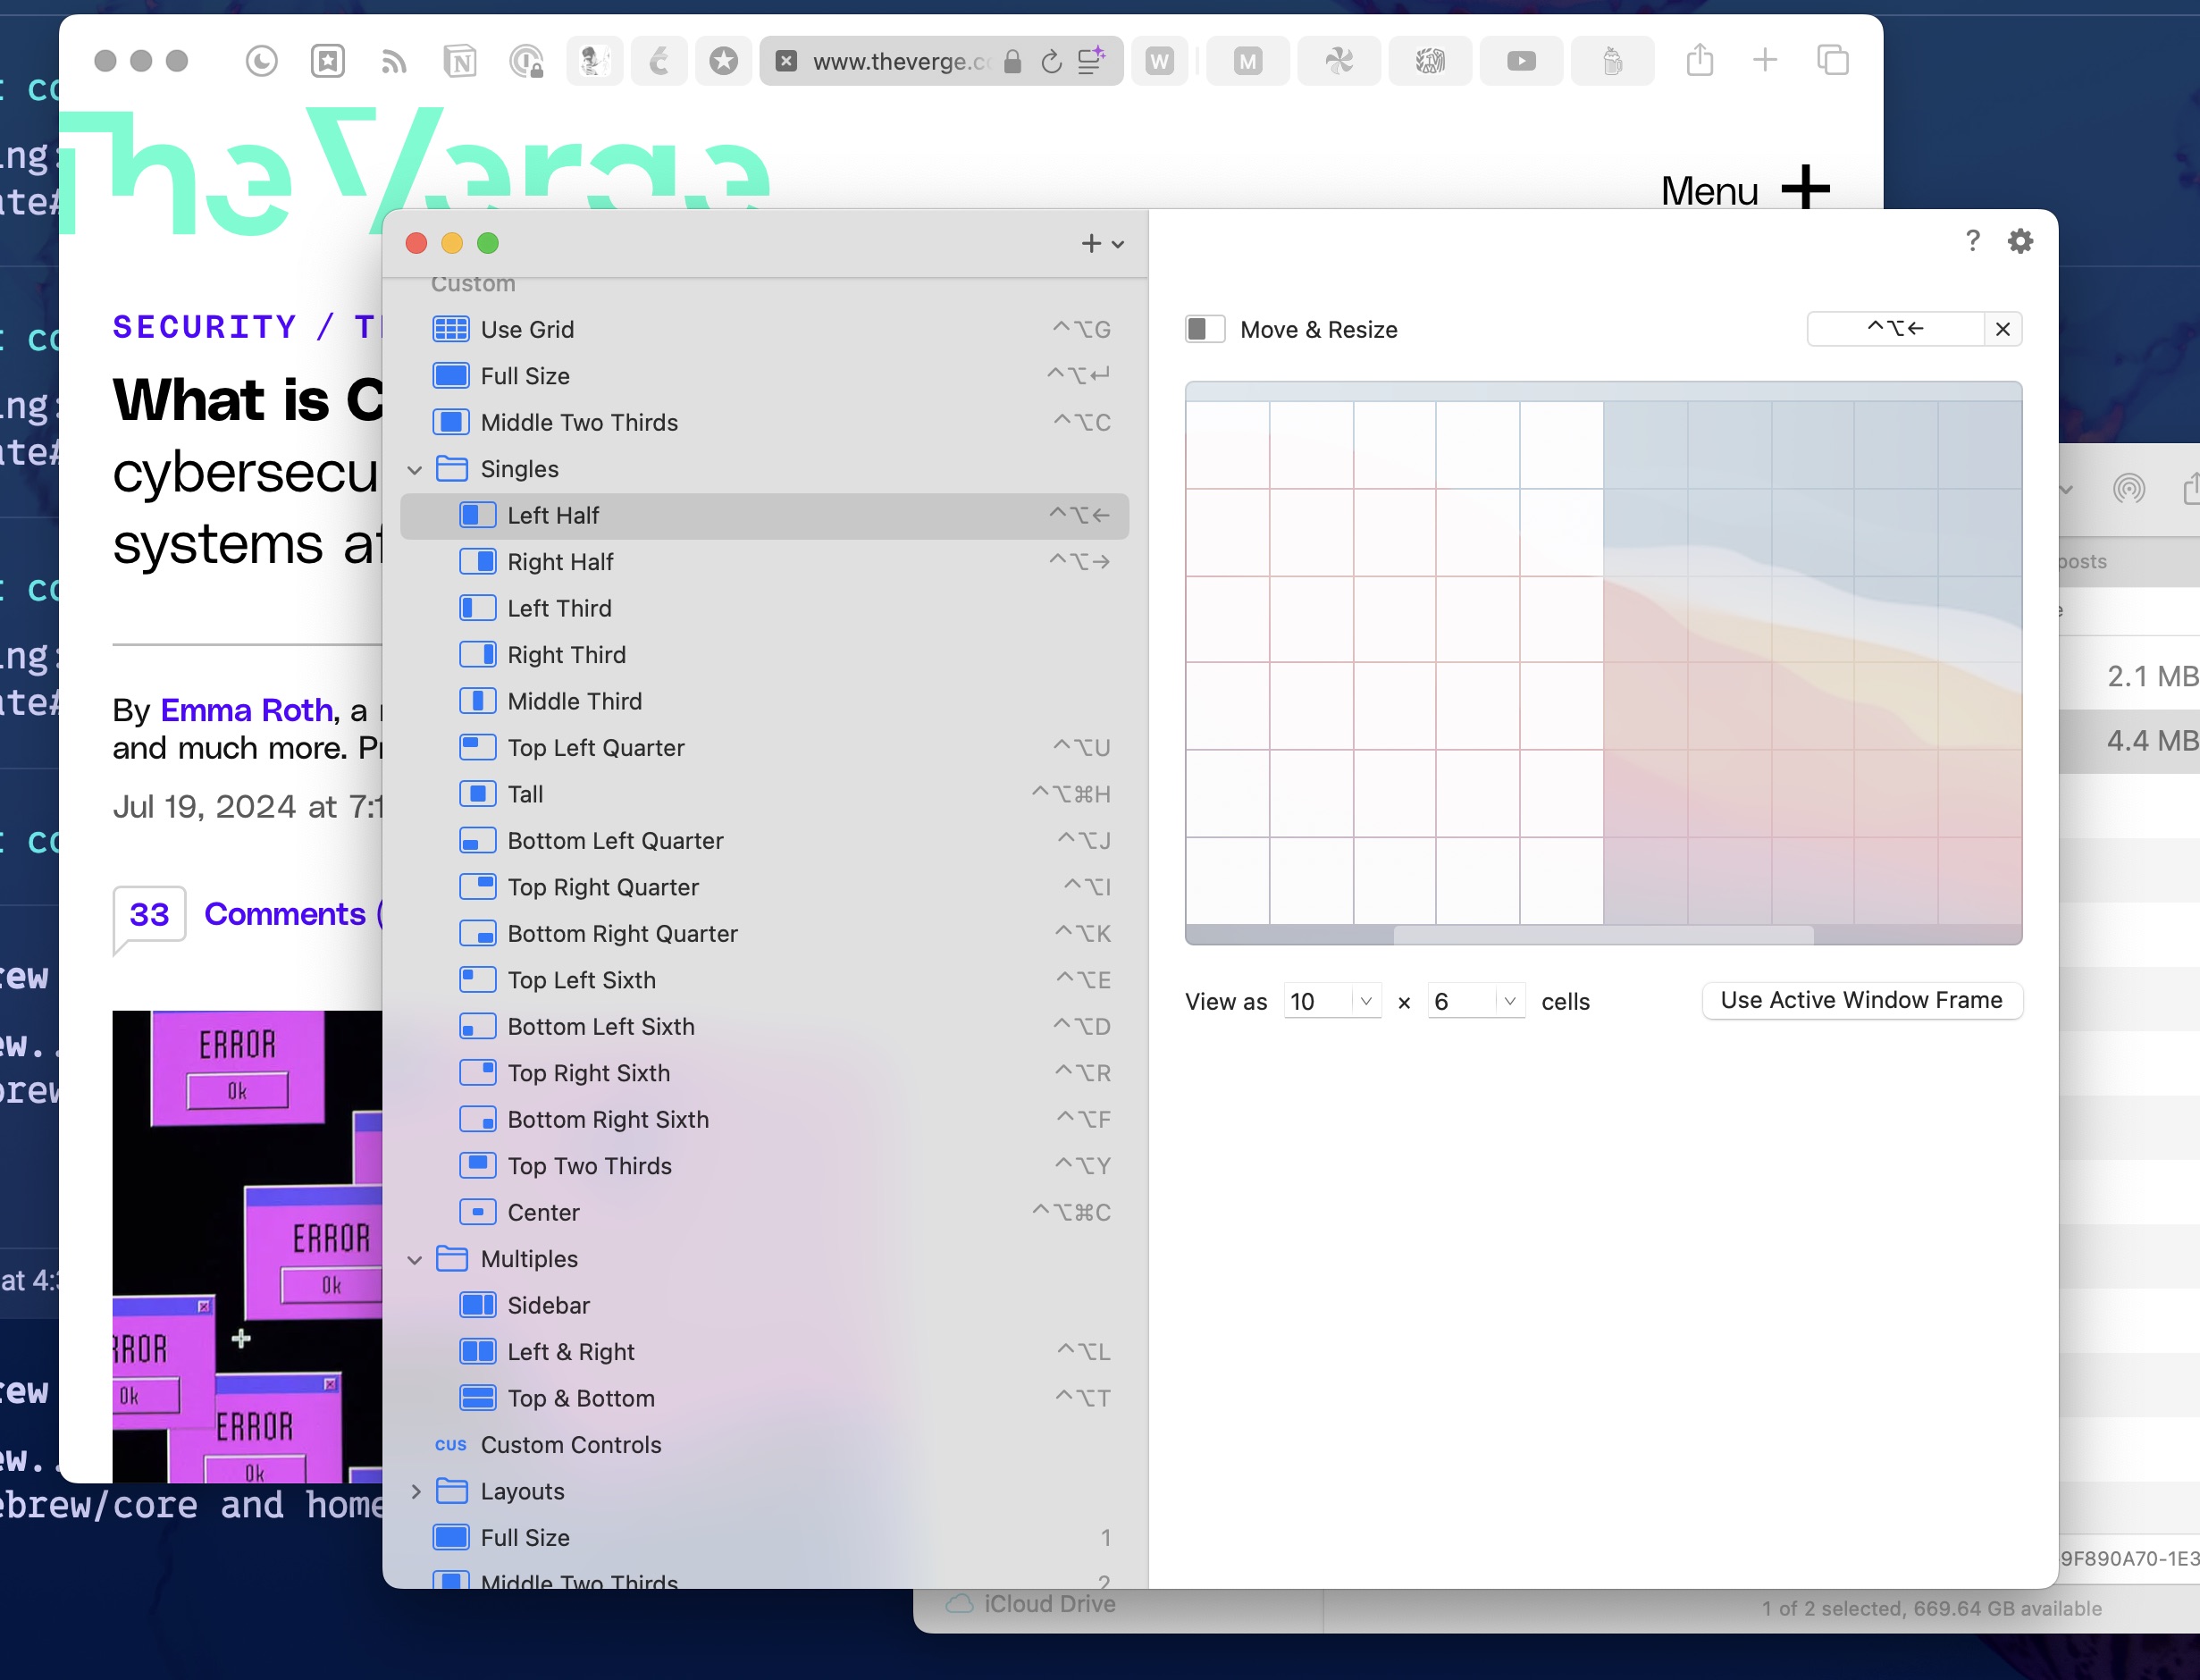
You can see some of my window settings complete with hotkeys in my Moom settings window below.
And in a bit of good news for me, Moom commands can be activated via AppleScript. Thanks to this, I modified my Sessions Raycast script command to accommodate setting window layouts using Moom instead of using Raycast’s window management tools. I’ll show you that in a future post.
I do like the window management commands in Raycast, and there’s always an argument for having one less application running in memory. But Moom is more versatile (and frankly more fun to use), and Raycast lets me disable its window management, and so Moom 4 seems like a no-brainer to me.
This is not a normal topic for me on this site, but since I blather on about technology nonstop and make my living thanks to it, it’s important to highlight the very real downsides it brings. For example, the current push towards electrification of everything is ramping the planet’s need for copper, and copper means exploitation, death, and environmental disaster to people in many parts of the world.
If this doesn’t sound very interesting, the human element of the story is intriguing. Just the part about Robert “Toxic Bob” Friedland illustrates how wild this story really is:
By the early 1980s Friedland had teamed up with some Vancouver-based financiers and moved into the world of mining, hustling for small gold outfits. He made headlines in 1992 when a Colorado gold mine he had previously overseen (as its parent company’s CEO) leaked toxic heavy metals into a nearby watershed, earning him the nickname “Toxic Bob.” In the meantime he had also discovered a major gold deposit in Alaska and an even bigger nickel deposit in Canada, which he later sold for more than $3 billion. Friedland has been a major player in the industry ever since. (He also has a sideline in movies, helping to produce Crazy Rich Asians and other films. Another fun Friedland fact: This summer, he bought a scenic California estate from Ellen DeGeneres for a trifling $96 million.)
Interestingly, at one point this guy ran the commune Steve Jobs lived on in Oregon in the ’70’s. Steve eventually left, disillusioned with what he saw as Toxic Bob’s materialism. Not to put too fine a point on it, but Toxic Bob was far from the only hippy idealist who transformed into an uber capitalist, convincing themselves in the process that it was for the good of humanity and not just their own ballooning bank accounts.
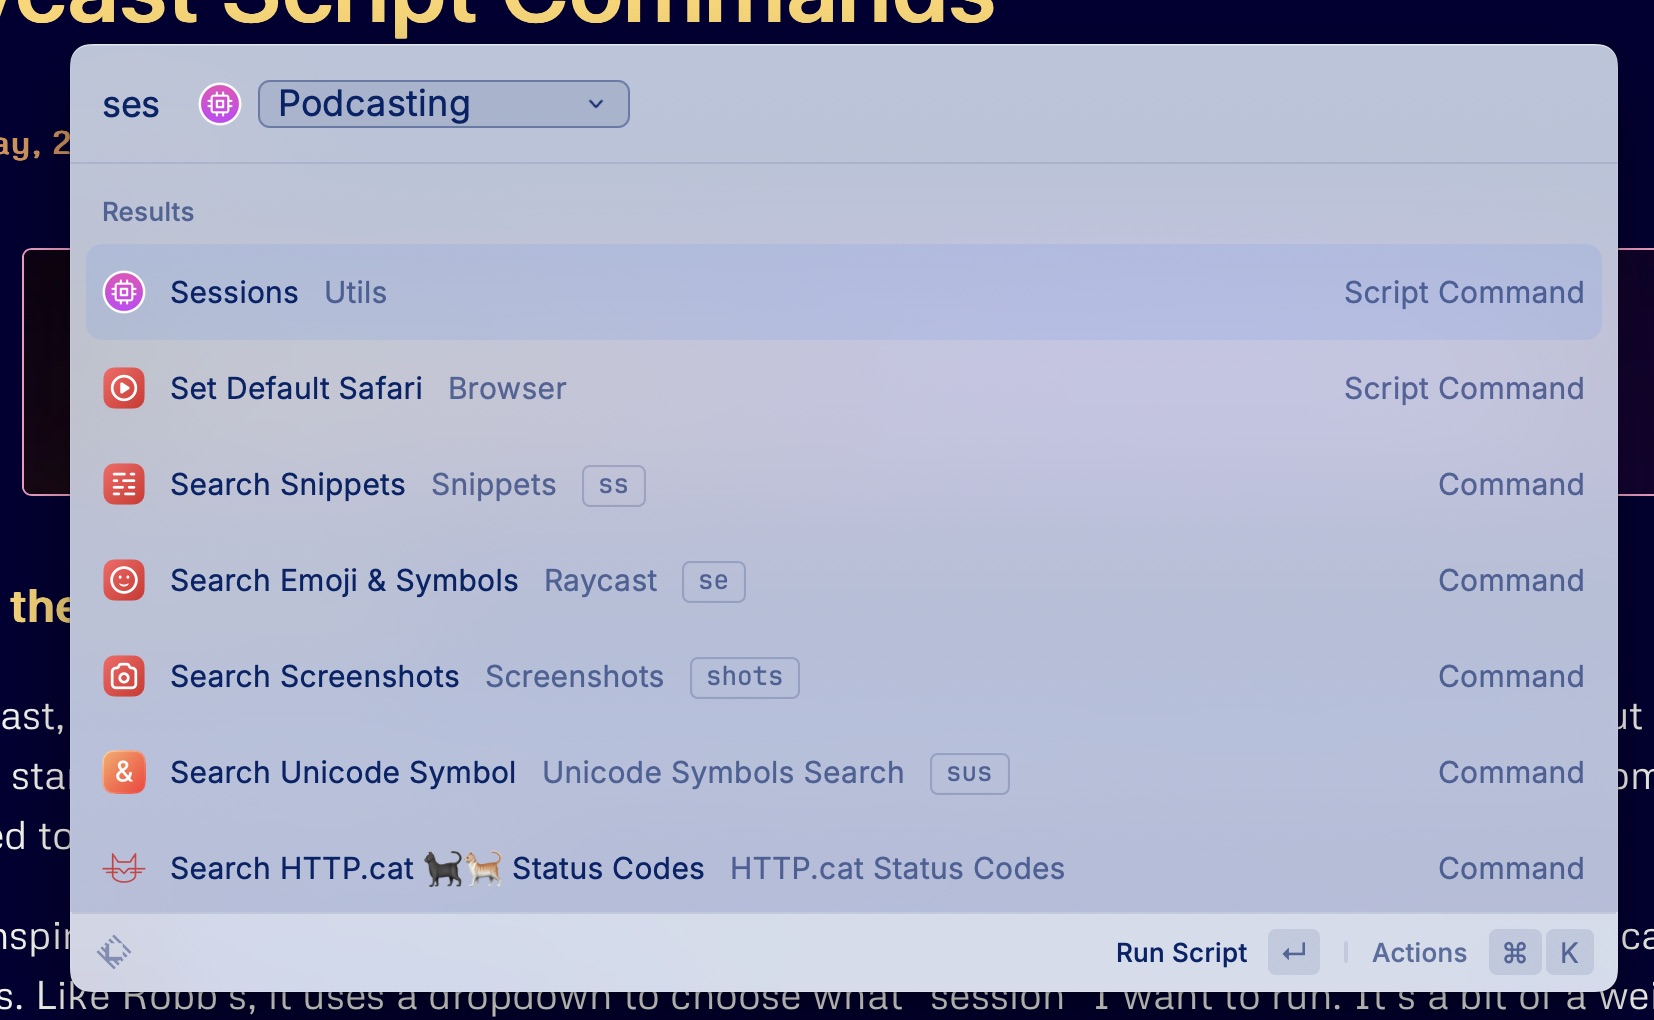
I took inspiration from Robb Knight’s App Mode Raycast script command and created one called Sessions. Like Robb’s, it uses a dropdown to choose what “session” I want to run. It’s a bit of a weird name, I guess, because I have one called “Stop Podcasting”, which doesn’t really seem like a session, but more like a lack of a session.
When I run the Sessions script command, I currently have two choices: Podcasting or Stop Podcasting.
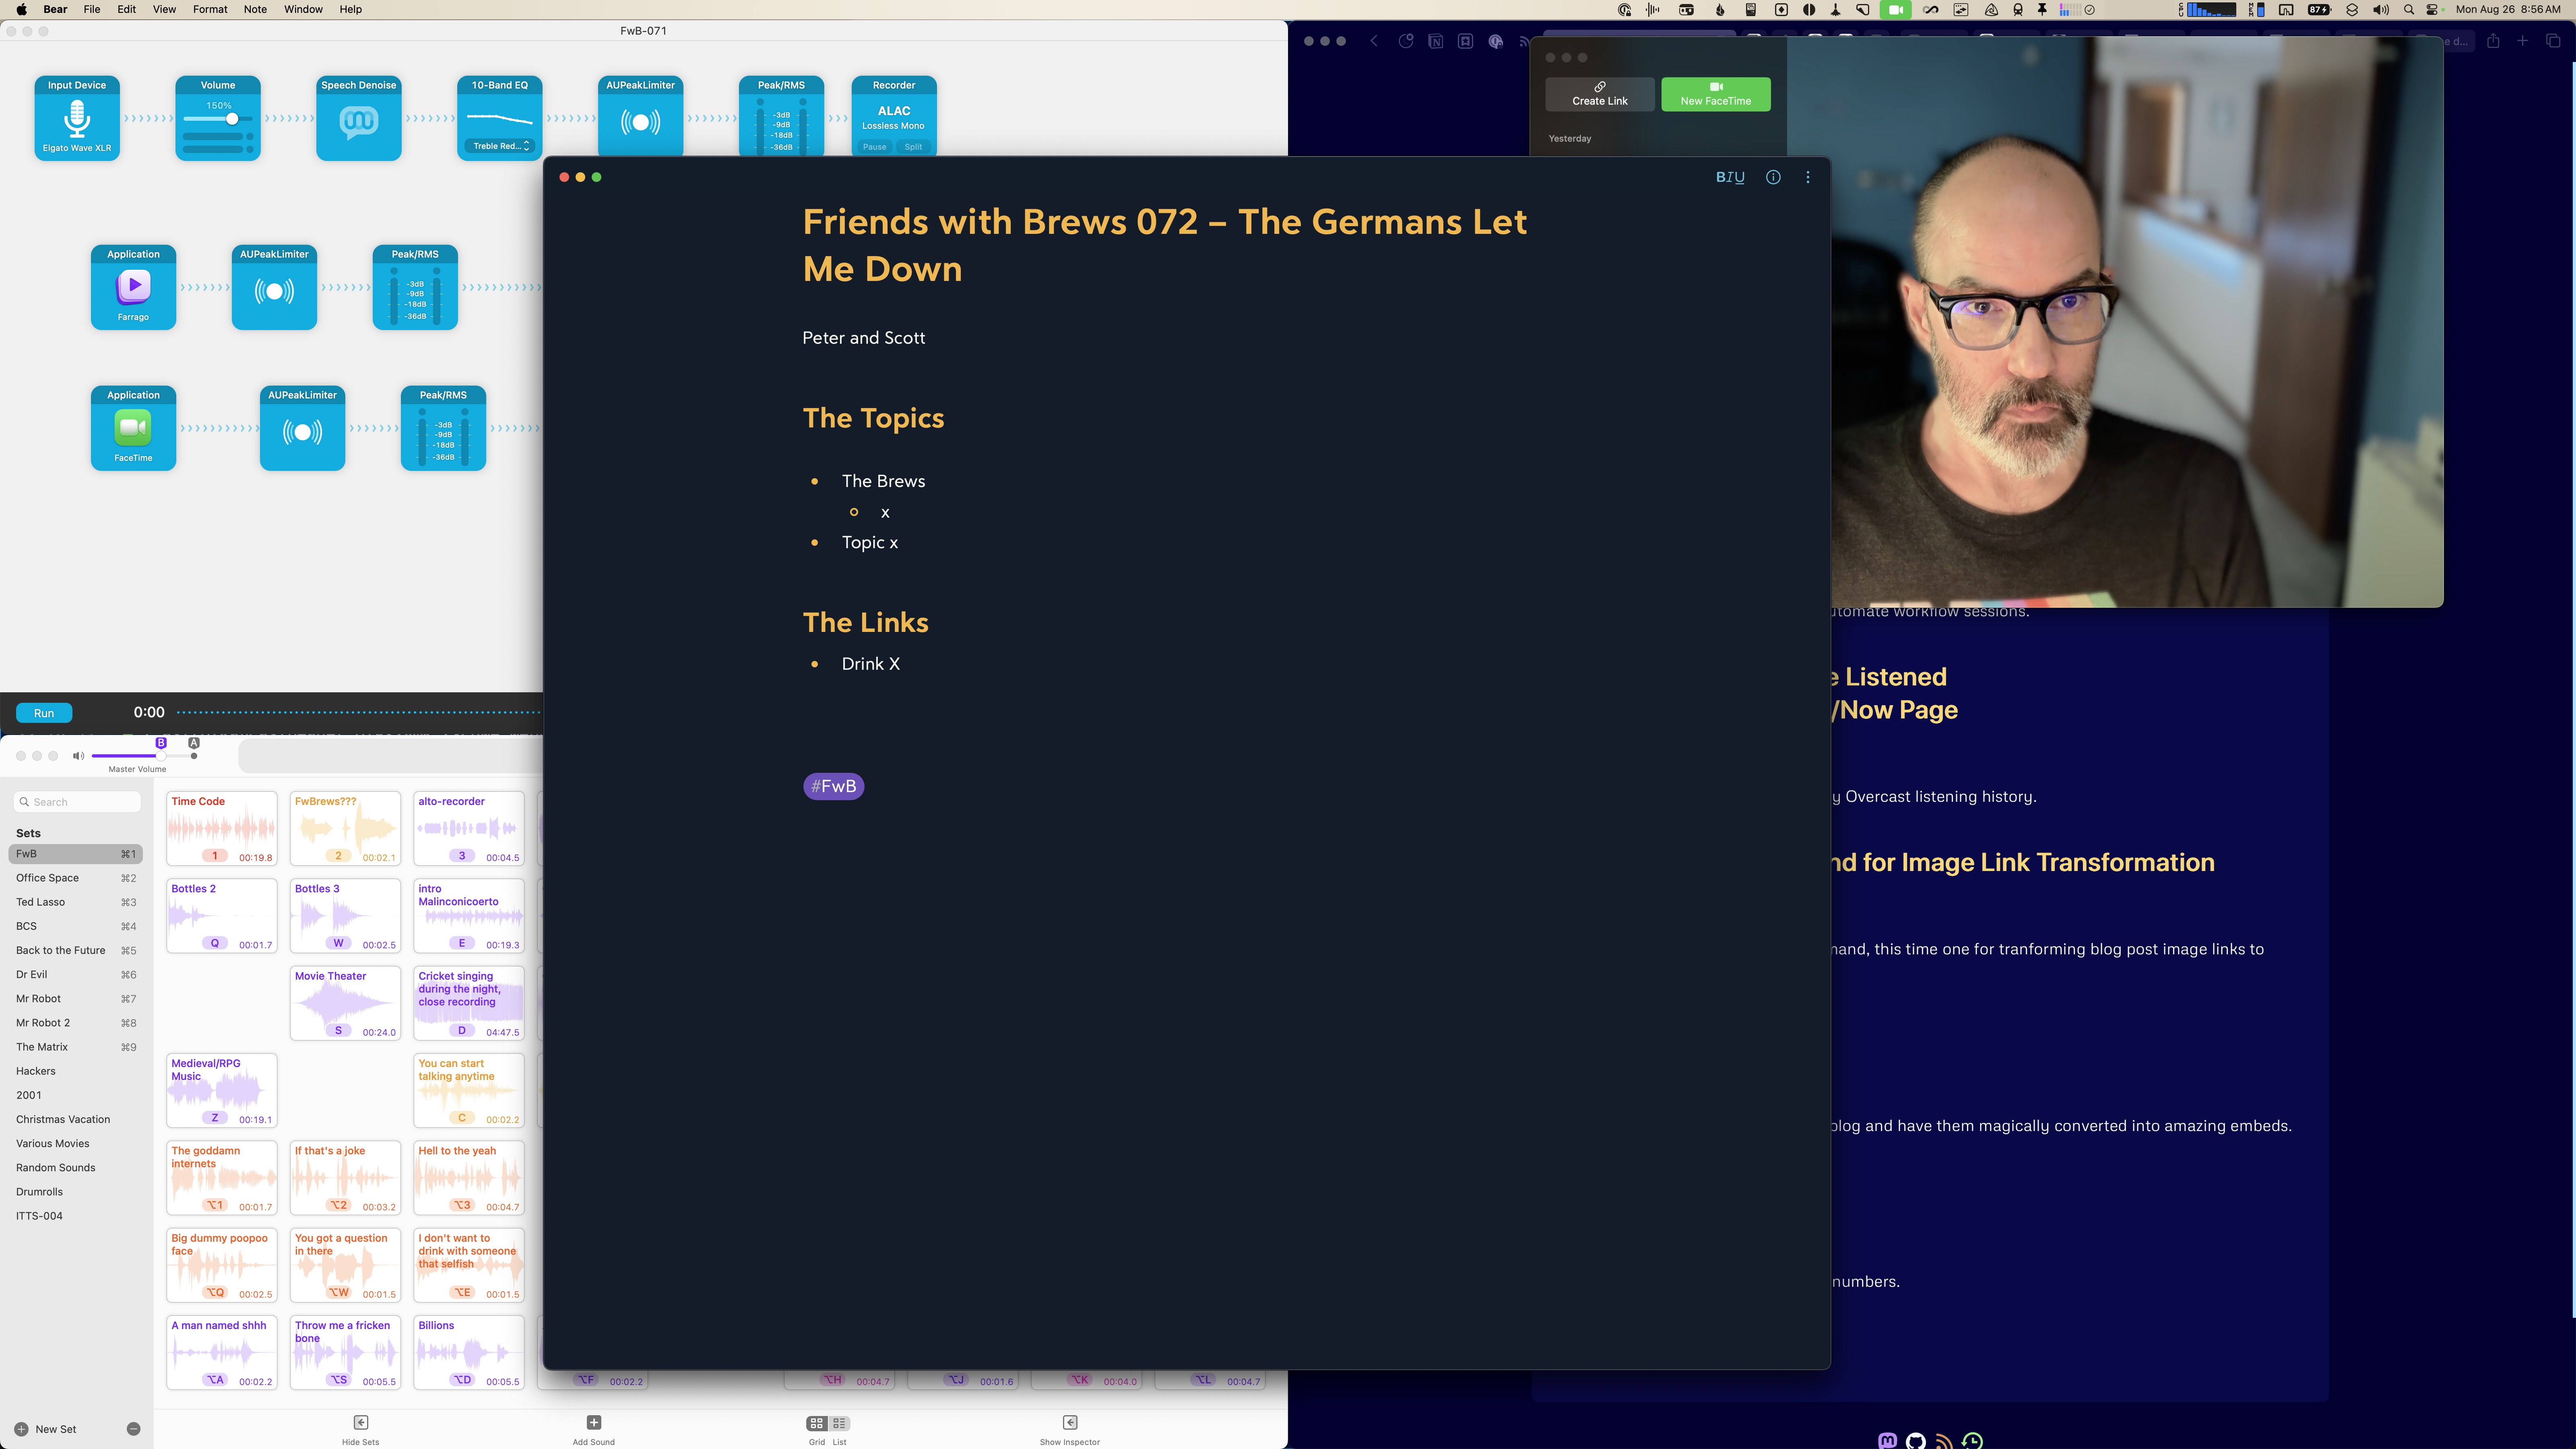
This is what the Raycast Window Layout Command looks like. The apps are Audio Hijack (top left), Farrago (bottom left), Bear (center), FaceTime (top right), and Safari (right half).
The script command also sets the audio output to my Elgato Wave XLR, which has my podcasting headphones plugged into it, and sets the audio input to a Loopback audio device that combines my podcasting mic and Farrago soundboard into one input device. Finally, it starts an Amphetamine session, which keeps the display from sleeping if I don’t touch the mouse or keyboard for awhile while podcasting, and toggles my desk lamps on using a Shortcuts shortcut.
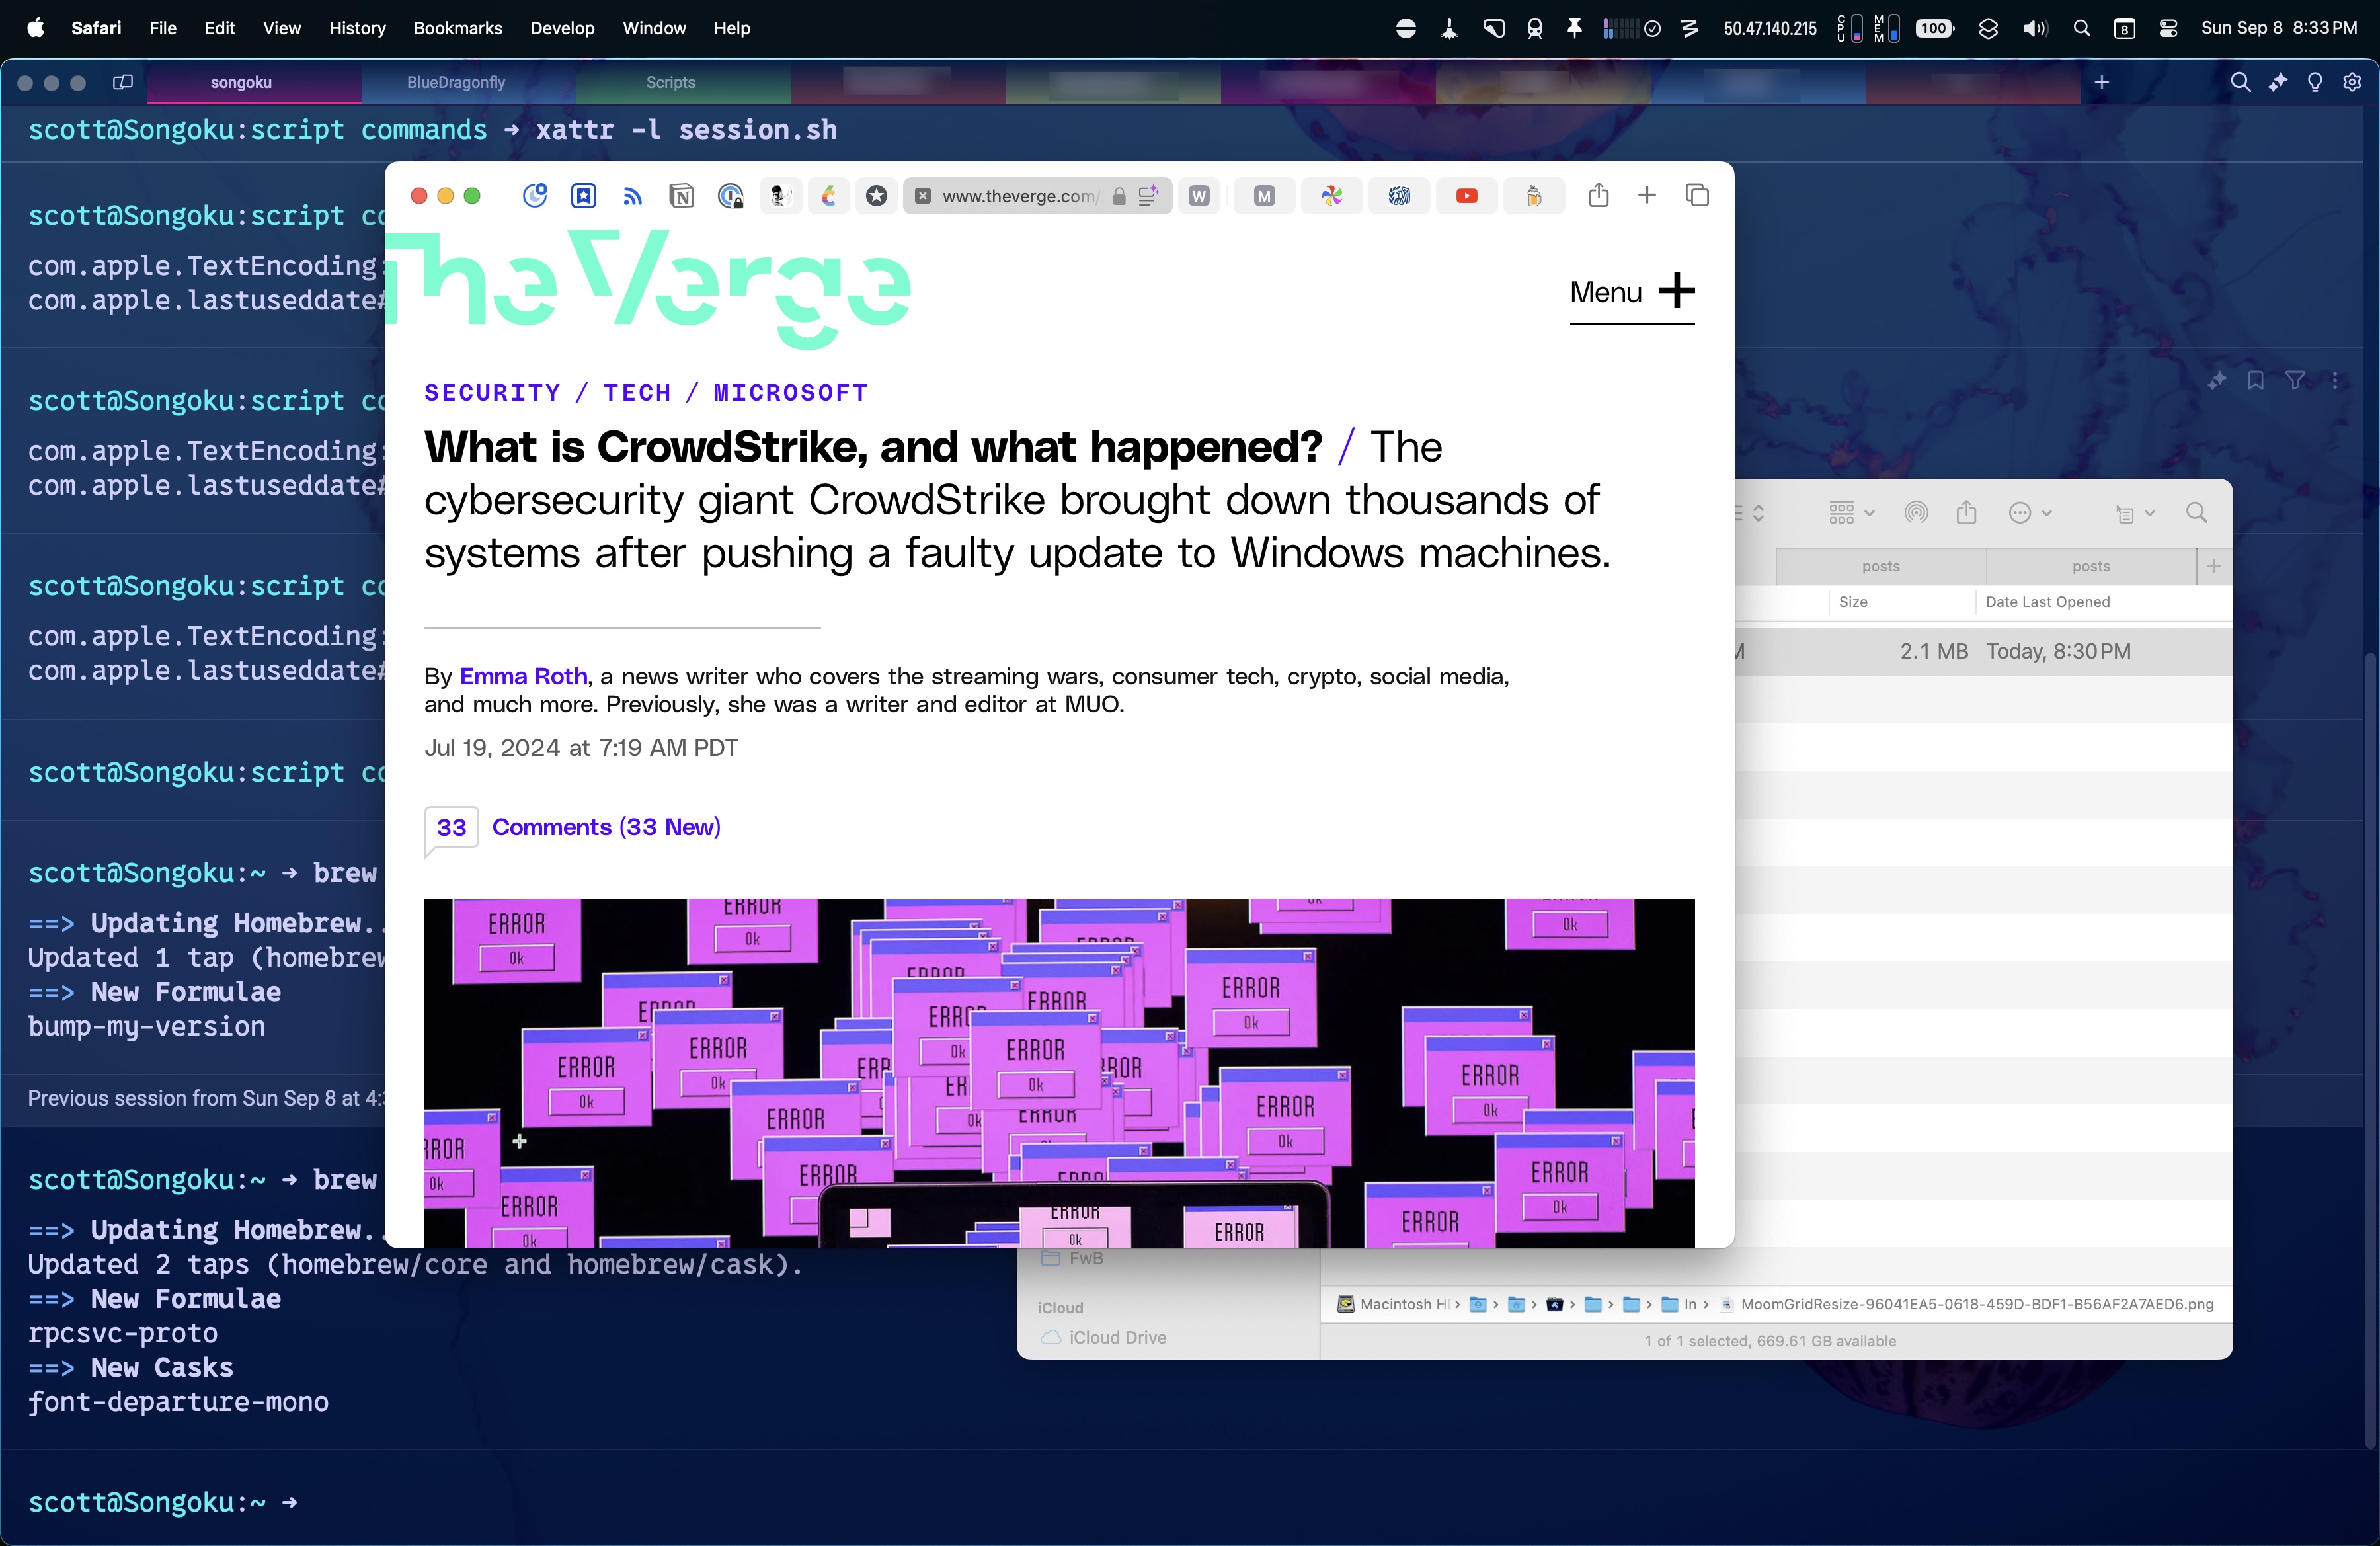
Here’s what it looks like on my Apple Studio Display after running the Sessions script command:
The Stop Podcasting option sets the audio output and input to my Studio Display’s speakers and mic, closes Audio Hijack, Farrago, Bear, and FaceTime, centers Safari on the screen again, and stops the Amphetamine session. It also toggles the desk lamps.
osascript-e'tell application "Amphetamine" to end session'
exit
fi
Raycast script commands can be written in bash script, Apple Script, Swift, Python, Ruby, or JavaScript (Node.js). This one is a bash script, and the Podcasting option very simply uses bash commands to run a bunch of other utilities: SwitchAudioSource, to set audio output and input, a Raycast custom window management command to open my podcast session apps and place their windows per a custom layout, a shortcut to toggle my desk lamps, and finally an inline Apple Script (osascript) to start an Amphetamine app session so the display can’t sleep.
The Stop Podcasting option runs similar commands plus several Apple Script calls to close the apps that were opened by the Raycast custom window layout in the Podcasting option.
Script commands are both a great reason to use Raycast and a great tool for automation if you already do use Raycast.